Enhancing Embroidery Designs with 3D Effects in Digitizing
Embroidery is a timeless art form that has been passed down for generations, from intricate hand-stitched patterns to modern machine embroidery techniques. As technology has evolved, so have the capabilities of embroidery machines and the designs they can create. One of the most exciting advancements in embroidery digitizing is the ability to create 3D effects, adding texture, depth, and dimension to designs that were once flat and one-dimensional. In this blog, we will explore how you can enhance your embroidery designs with 3D effects through digitizing, the tools and techniques required, and some practical tips for achieving stunning results.
What is 3D Embroidery Digitizing?
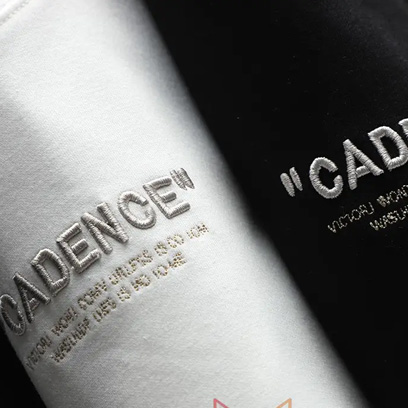
Embroidery digitizing is the process of converting a design or artwork into a format that can be read by an embroidery machine. In traditional embroidery, the design is flat and consists of simple stitches like running stitches, satin stitches, or fill stitches. However, with 3D embroidery, digitizers can manipulate stitch types, densities, and layers to create raised, textured effects that make designs pop.
The most common types of 3D embroidery include:
1 - 3D Puff Embroidery:

This method involves using foam under the stitches to create a raised or "puff" effect.
2 - Raised Satin Stitches:
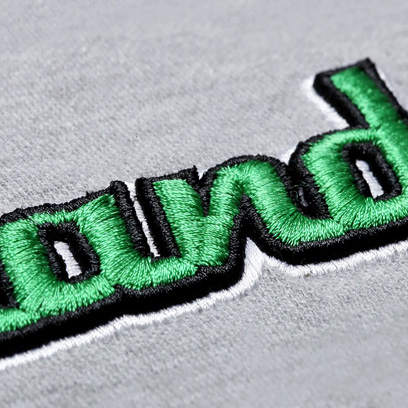
Layering satin stitches to create thicker, more pronounced lines.
3 - Textured Fill Stitches:
Adding depth and texture to filled areas using various stitch patterns and densities.
Each of these techniques requires different approaches in the digitizing phase, and understanding the intricacies of each will help you achieve the best results.
Why Use 3D Effects in Embroidery?
3D embroidery offers a multitude of benefits that can set your designs apart. Some key reasons to incorporate 3D effects include:
1 - Enhanced Visual Appeal:
The added depth and dimension can make logos, text, or artwork stand out, creating a bold, eye-catching result.
2 - Tactile Experience:
With raised elements, 3D embroidery is not only visually engaging but also adds a tactile quality to your work, appealing to the sense of touch.
3 - Versatility in Design:
Whether it’s bold lettering for hats, intricate logos on sports apparel, or adding texture to larger artwork, 3D effects can be applied to a wide range of design elements.
4 - Professional Finish:
Brands looking for a premium, high-end appearance often prefer 3D embroidery, as it elevates the perceived quality of the finished product.
The Key Techniques for Adding 3D Effects in Embroidery Digitizing
There are several core techniques that digitizers use to create 3D effects in embroidery. Let’s break down some of the most important methods and how they are applied in the digitizing process.
1 - 3D Puff Embroidery
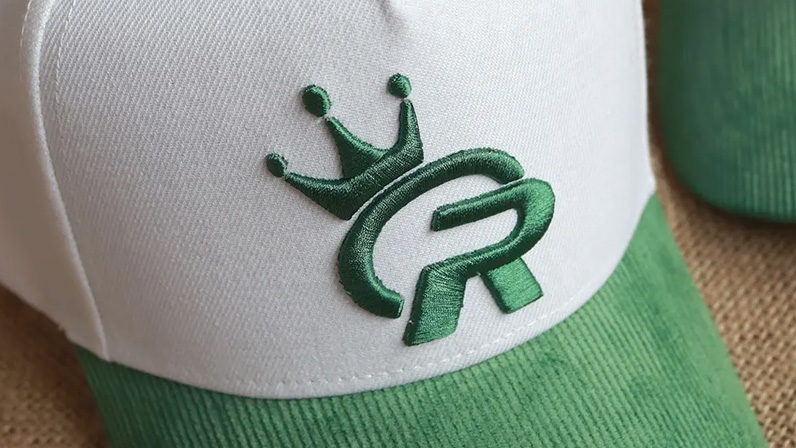
One of the most popular methods for creating a raised effect is using foam in what’s known as puff embroidery. This technique is especially common in logos, hats, or any design where a bold, elevated effect is desired. To achieve this, a piece of foam is placed on the fabric before the embroidery machine stitches over it. The foam lifts the stitches, creating the puff effect.
How to Digitize for 3D Puff Embroidery:
- Stitch Density: When digitizing for puff embroidery, you need to increase the density of your satin stitches to compress the foam beneath. The goal is to cover the foam entirely so that it doesn’t show through the stitches.
- Stitch Type: Satin stitches are typically used for puff embroidery because they are dense enough to hold the foam down and create smooth edges.
- Edge Cleanup: The machine will cut the foam as it stitches, but leaving open-ended satin stitches can result in loose foam edges. To avoid this, digitize with sharp, closed corners and adjust the stitch path to clean up any edges that might allow the foam to poke through.
- Foam Compatibility: Ensure that the foam thickness matches the design size and stitching density. A common foam thickness for 3D puff embroidery is around 3mm.
2 - Raised Satin Stitches

Satin stitches are commonly used in embroidery for outlines, lettering, and fine details. By layering satin stitches or increasing their density, you can create a raised effect without the need for foam. This technique works well for text embroidery, borders, and other elements that benefit from more definition.
How to Digitize for Raised Satin Stitches:
- Layering: One method to achieve a raised effect with satin stitches is to layer multiple passes of the same stitch. The first layer is stitched normally, and subsequent layers are stitched on top to build height.
- Stitch Length: For raised satin stitches, you’ll need to adjust the stitch length to ensure smooth coverage. Longer stitches are ideal for raised effects because they appear smoother and more refined when stacked.
- Underlay Stitches: Adding an underlay before applying the satin stitch layers will give the design more structure and prevent the fabric from puckering or distorting. Use a zigzag or double underlay to provide a solid base for the satin stitches.
3 - Textured Fill Stitches
Fill stitches are typically used for larger areas of embroidery, but by manipulating the stitch direction, length, and density, you can create textured effects that give the design more depth and complexity. Textured fill stitches work particularly well for creating 3D effects in nature scenes, animal fur, or abstract patterns.
How to Digitize for Textured Fill Stitches:
- Varying Stitch Direction: By changing the direction of fill stitches in different sections of the design, you can create a sense of depth and texture. For example, alternating stitch angles in adjacent areas can give the illusion of light and shadow, enhancing the 3D effect.
- Stitch Patterns: Experiment with different fill stitch patterns, such as brick, lattice, or ripple, to add texture and depth to the design. Some embroidery software programs offer a variety of preset patterns that can be applied to specific areas of the design.
- Layered Fills: To achieve a more pronounced 3D effect, you can layer fill stitches on top of each other. This works especially well for elements like fur, feathers, or grass, where you want to create a sense of volume and dimension.
- Density Adjustments: Higher stitch densities create a more solid, raised effect, while lower densities can give the appearance of lightness and transparency.
Tools and Software for 3D Embroidery Digitizing
To achieve professional-quality 3D embroidery, the right tools and software are essential. Most modern embroidery digitizing software programs offer the necessary features to create 3D effects, but some programs are better suited for this purpose than others.
Popular Software for 3D Embroidery Digitizing:
- Wilcom Embroidery Studio: One of the industry leaders in embroidery digitizing software, Wilcom offers a range of tools for creating 3D puff embroidery, raised satin stitches, and textured fills. Its intuitive interface makes it easy to manipulate stitch types, densities, and underlays to achieve the desired effect.
- Hatch Embroidery Software: Hatch is a more affordable option from Wilcom, designed for home embroiderers and small businesses. It includes many of the same features as Wilcom Embroidery Studio, including tools for creating 3D effects.
- Pulse Embroidery Software: Pulse offers professional-grade embroidery software with advanced 3D digitizing capabilities. Its stitch simulation features allow digitizers to preview how 3D effects will look before stitching, making it easier to perfect designs.
- Brother PE-Design: A popular choice for home embroiderers, Brother PE-Design offers basic 3D puff embroidery tools and other features that allow users to experiment with raised stitches and textures
Hardware Requirements:
In addition to software, the quality of your embroidery machine will also affect the outcome of your 3D designs. Machines with higher stitch per minute (SPM) rates, multiple needle capabilities, and advanced tension control will yield better results. A high-quality machine can handle the thicker layers of stitching and foam required for 3D embroidery without issues like thread breaks or tension inconsistencies.
Practical Tips for Creating Stunning 3D Embroidery
Achieving flawless 3D embroidery designs requires a combination of skill, patience, and experimentation. Below are some practical tips to help you create stunning 3D effects in your embroidery projects.
1 - Choose the Right Design

Not all designs are suited for 3D embroidery. Simple shapes, bold letters, and minimalistic logos often work best. Avoid intricate details or tiny text, as these elements can get lost or distorted when applying 3D effects. Start with a clean, uncomplicated design that can be easily adapted for raised stitches.
2 - Test Your Design
Always test your digitized design on a scrap piece of fabric before stitching it on the final product. This allows you to fine-tune the stitch density, adjust underlays, and make other necessary changes to ensure the best results.
3 - Stabilize Your Fabric
Proper stabilization is crucial for 3D embroidery, especially when working with foam. Use a stabilizer that matches your fabric type and design needs. A cut-away stabilizer works best for heavier fabrics, while a tear-away stabilizer may suffice for lighter materials.
4 - Choose Quality Materials
From foam to thread, the quality of your materials will affect the outcome of your design. Use high-density foam for 3D puff embroidery to ensure that the stitches hold their shape, and opt for durable embroidery threads that can withstand the added tension of raised designs.
5 - Experiment with Layering
Don’t be afraid to experiment with layering different stitch types and densities to create more intricate 3D effects


0 Comments